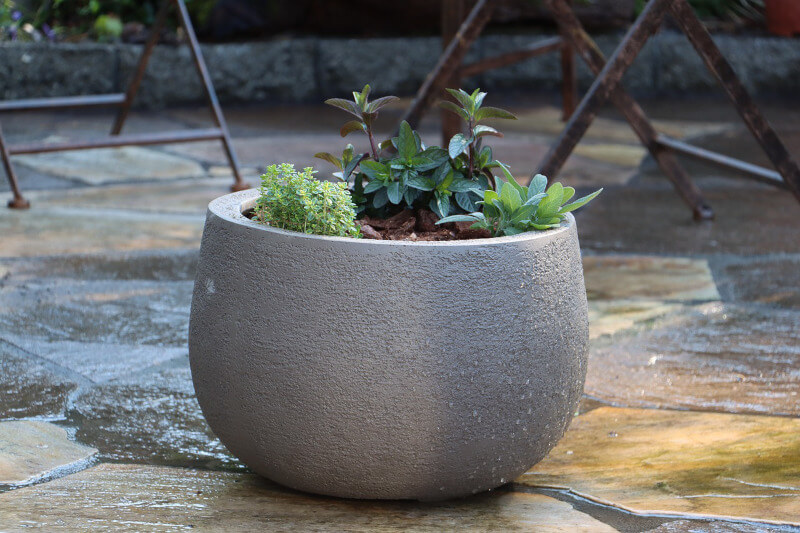
Concrete objects have an allure of their own, thanks to the raw quality that is often associated with modern industrial design. There are many sources of this trait. Most commonly, these items are one-of-a-kind plant accessories made to withstand the elements in your indoor or outdoor space. So, today we’ll show you how to make a simple concrete project that’s both fun and easy enough for beginners. You can get a lot done in a short amount of time if you just follow these easy instructions.
There are only six basic steps involved in making your own concrete plant pots, and you can select from a wide variety of sizes and shapes to suit your specific needs and aesthetic preferences. To make an already stunning effect even more so, you can add decorative shells or shards of glass. This DIY project will be fun whether you’re making large tubs for the garden or tiny pots for cacti. You’ll need the following things to get started making your concrete flower pots:
Subbasement Concrete (Which You Can Find in Hardware Shops)
- The cardboard boxes and scissors needed to create them
- Glass flakes
- Glass beads
- Shells
- Pebbles
- A mixing bucket or wheelbarrow (depending on your decorations)
Creating the Mould for the Concrete

An outer mould and an inner mould are required to get started. Both should be of the same general shape, but not identical dimensions. Once the smaller form is inserted into the larger form, there should be about 5 centimetres of clearance.
After this hole is filled, the thickness of your planting dowel will be determined by the amount of concrete you use to fill it. If you’re going to make a planting bucket that’s over 60 centimetres in height and width, you should also make it at least 7.5 centimetres thick. You can also use two cardboard boxes that you’ve built and glued together to make a mould. The shapes and sizes of the moulds can be figured out in this way. You can find moulds made of glass, plastic, cardboard, stainless steel, and even Styrofoam.
Inspect the Moulds to Make Sure the Insides Are Prepped for Use
Lubricants, such as paraffin oil, sunflower oil, or another type of lubricant, must be applied to the interior of the moulds that will come into contact with the concrete. Doing this first will make removing the concrete bucket from the mould a lot less of a hassle. Care must be taken to avoid breaking the glass mould when removing the bucket from its encasing. If you want the finished product to be unique and suited to your specific preferences in terms of both your taste and the layout of your garden, feel free to experiment with different mould shapes and sizes for this do-it-yourself project.
Combine the Cement’s Components
To avoid getting concrete on your hands, wear protective gloves when mixing it in the wheelbarrow or bucket. When possible, use high-strength concrete for the best results. While stirring, transfer the concrete to a wheelbarrow or other container. Add the water slowly while continuing to stir the concrete.
To ensure that your concrete turns out properly, be sure to follow the mixing ratio specified on the box. Doing so will guarantee that your concrete is formed correctly. When mixing concrete, you can also incorporate decorative items like shards of glass, stones, shells, pearls, and other jewellery. With this technique, you can create beautiful and unique pots, but it’s important to remember to keep the concrete consistent consistency. Location: in the centre of the concrete, with the mould in place
Now We’ll Move on to the Concrete Casting Phase
The base of your planter is made by slowly and evenly pouring the concrete mixture into the outer mould from the top. This forms the base of the planter. Wait at least two days after the concrete has dried before sticking pebbles into the ground or drilling a few holes for drainage in your planting hole.
Use a spatula or masonry trowel to even out the concrete, then set the inner mould on top. To get the right depth for your planting bucket, you’ll need to press them. As long as your planter is not top-heavy, the bottom and potter walls should be about the same thickness. Alternatively, the potter’s base can be made slightly thicker.
The remaining concrete is poured into the space between the two forms. Pressing the mixture with a spatula or trowel will help get rid of any air bubbles. Use the spatula to spread the liquid out evenly after pouring it over the edge of the pot.
Give It Some Time to Dry Completely
Now comes the patient part; after carefully wrapping the bucket and casting moulds in a plastic tarp or plastic bag, you’ll need to leave them alone for about 36 hours. Also, make sure you adhere to the curing time specified on the concrete bag. Next, you should use a knife or a corkscrew to see if your concrete planters are dry enough to use. If the concrete can be poked with a stick, it is still too wet and needs more time to dry.
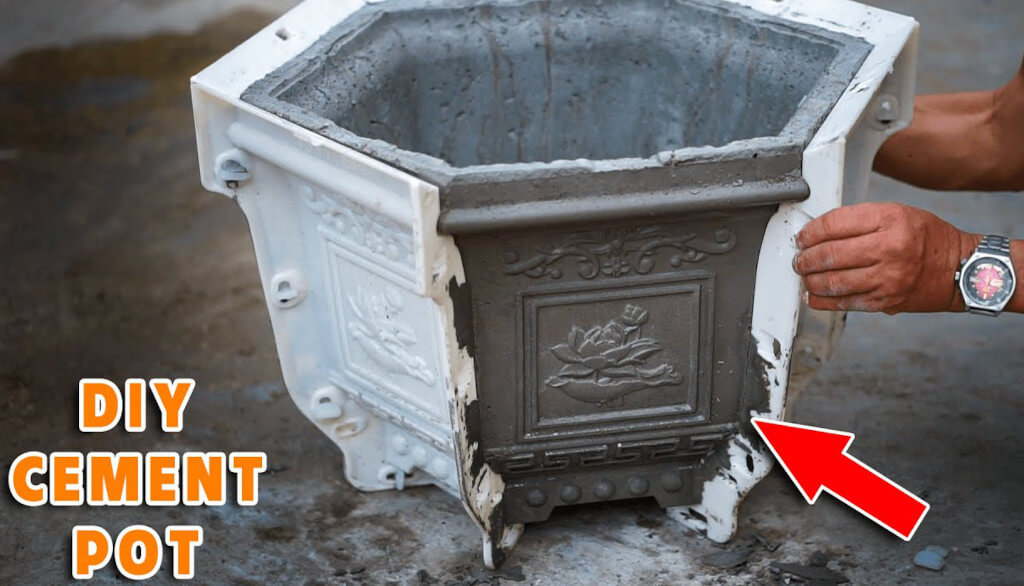
Carefully Take the Planter Out of the Mould, and Set It Aside
If you’re using concrete, wait for it to dry completely before attempting to remove the planter from the mould. If it’s made of cardboard, you shouldn’t have any trouble removing it. Sandpaper is useful for levelling and smoothing the surface you’re working on. The pottery needs to dry for about a week before it can be used, so be patient. Once a day, using a damp sponge or cloth, rub the pot to deepen the colour. After two days have passed, you can begin making holes in the base of the container for drainage.
These days, you can’t go wrong with a concrete plant container indoors or out. Using simple household items like cellar concrete, glass flakes, beads, shells, and pebbles, we’ve outlined a six-step process for making your own concrete plant pots for your indoor plants. If you follow these steps, you can build planters to fit your specific needs and preferences, whether that be in terms of size, shape, or decorative elements. So unleash your inner artist with this simple DIY craft to spruce up your plant life.